Using a9s Messaging
This topic describes how developers use a9s Messaging.
Use a9s Messaging With an App
To use a9s Messaging with an application, create a Service Instance and bind the Service Instance to your application. For more information on managing Service Instances, see Managing Service Instances with the cf CLI.
View the a9s Messaging Service
After the service is installed, you can see the a9s-messaging and its service plans appear in your CF marketplace.
Run cf marketplace to see the service listing:
$ cf marketplace
Getting services from marketplace in org test / space test as admin...
OK
service          plans                                               description
a9s-messaging313 messaging-single-small, messaging-cluster-small,    This is a service creating and managing dedicated Messaging Service Instances, powered by the
                 messaging-single-big, messaging-cluster-big         anynines Service Framework
Create a Service Instance
To provision a RabbitMQ database, run cf create-service. For example:
cf create-service a9s-messaging313 messaging-single-small my-messaging-service
Depending on your infrastructure and service broker utilization, it might take several minutes to create the Service Instance.
Run the cf services command to view the creation status. This command displays a list of all your Service Instances.
To view the status of a specific Service Instance, run cf service NAME-OF-YOUR-SERVICE.
Bind an Application to a Service Instance
After your database is created, run cf bind-service to bind the service to your application:
cf bind-service a9s-rabbitmq-app my-messaging-service
Restage or Restart Your Application
To enable your appliation to access the Service Instance, run cf restage or cf restart to restage or restart your
app.
Obtain Service Instance Access Credentials
After a Service Instance is bound to an application, the credentials of your RabbitMQ database are stored in the
environment variables of the application. Run cf env APP-NAME to display the environment variables.
You can find the credentials in the VCAP_SERVICES key.
$ cf env a9s-rabbitmq-app
Getting env variables for app a9s-rabbitmq-app in org test / space test as admin...
OK

System-Provided:
{
  "VCAP_SERVICES": {
    "a9s-messaging313": [
      {
        "credentials": {
          "host": "hostname.node.dcx.consul",
          "hosts": [
            "hostname.node.dcx.consul"
          ],
          "password": "password",
          "port": 5672,
          "http_api_uri": "http://username:password@hostname.node.dcx.consul/api/",
          "http_api_uris": ["http://username:password@hostname.node.dcx.consul/api/"],
          "protocols": {
            "amqp": {
              "host": "hostname.node.dcx.consul",
              "hosts": [
                "hostname.node.dcx.consul"
              ],
              "password": "password",
              "port": 5672,
              "ssl": false,
              "uri": "amqp://username:password@hostname.node.dcx.consul:5672",
              "username": "username"
            },
            "management": {
              "username": "username",
              "password": "password",
              "path": "/api",
              "ssl": false,
              "host": "hostname.node.dcx.consul",
              "hosts": [
                "hostname.node.dcx.consul"
              ],
              "uri": "http://username:password@hostname.node.dcx.consul",
              "uris": ["http://username:password@hostname.node.dcx.consul"]
            }
          },
          "ssl": false,
          "uri": "username:password@hostname.node.dcx.consul:5672",
          "username": "username"
        },
        "label": "a9s-messaging313",
        "name": "rabbitmq-app",
        "plan": "messaging-single-small",
        "provider": null,
        "syslog_drain_url": null,
        "tags": [
         "messaging",
         "queue"
        ],
        "volume_mounts": []
      }
    ]
  }
}
...
You can use the host, username and password values to connect to your database with a RabbitMQ client.
Protocols Hash
The credentials hash contains a protocols hash that lists credentials by protocol. The credentials at the root level of the credentials are either for AMQP with non SSL service plans or AMQPS with SSL service plans.
| Protocol key | Enabled when |
|---|---|
amqp | always |
amqp+ssl | SSL plan |
mqtt | MQTT plugin enabled |
mqtt+ssl | SSL plan and MQTT plugin enabled |
webmqtt+ssl | SSL plan and WebMQTT plugin enabled |
stomp | STOMP plugin enabled |
stomp+ssl | SSL plan and STOMP plugin enabled |
webstomp+ssl | SSL plan and WebSTOMP plugin enabled |
management | always |
Best Practices
There are some best practices for using service binding information in apps in a separate document.
Delete an a9s Messaging Service Instance
Before deleting a Service Instance, you must backup data stored in your database. This operation cannot be undone and all the data is lost when the Service Instance is deleted.
Before you can delete a Service Instance, you must unbind it from all apps.
List Available Services
Run cf services to list your available services.
$ cf services

Getting services in org test / space test as admin...
OK

name                   service           plan                     bound apps         last operation
my-messaging-service   a9s-messaging313   messaging-single-small   a9s-rabbitmq-app   create succeeded
This example shows that my-messaging-service is bound to the a9s-rabbitmq-app application.
Unbind a Service Instance
Run cf unbind-service to unbind the Service Instance from your app.
cf unbind-service a9s-rabbitmq-app my-messaging-service
Delete a Service Instance
After unbinding the service, it is no longer bound to an application. Run cf delete-service to delete the service:
cf delete-service my-messaging-service
It may take several minutes to delete the service. Deleting a service deprovisions the corresponding infrastructure resources.
Run the cf services command to view the deletion status.
Upgrade the Service Instance to Another Service Plan
Once created, you can upgrade your Service Instance to another, larger service plan. A larger service plan provides more CPU, RAM and storage. For more information, see the Update a Service Instance of the Managing Service Instances with the cf CLI topic.
cf update-service my-messaging-service -p a-bigger-plan
Add a Graphite Endpoint
Streaming of logs and metrics might not be available for your plan! If unsure, please check your plan description.
If you want to monitor your service with Graphite, you can set the custom parameter graphite. It expects the host and
port where the Graphite metrics should be sent to.
For example, in order to send Graphite metrics to an endpoint yourspace.your-graphite-endpoint.com:12345, you can use
the following command:
cf update-service my-instance -c '{ "graphite": "yourspace.your-graphite-endpoint.com:12345" }'
The endpoint would then receive metrics in the format:
<service_guid>.<service_type>.<host>.<metric> <metric value> <metric timestamp>
Metrics Frequency
By default, metrics will be emitted every 10 seconds. You can change the interval via the custom parameter
metrics_frequency.
For example, in order to send Graphite metrics to an endpoint every minute, you would set the custom parameter
metrics_frequency to 60 using the following command:
cf update-service my-instance -c '{ "metrics_frequency": 60 }'
Metrics Prefix
Depending on your graphite provider, you might need to prefix the metrics with a certain value, like an API key for
example. In this case you can leverage the custom parameter metrics_prefix.
cf update-service my-instance -c '{ "metrics_prefix": "my-api-key-for-a-certain-provider" }'
The resulting metric path would have the format:
<metrics_prefix>.<service_guid>.<service_type>.<host>.<metric>
Cloud Foundry Org and Space Guid
The Platform Operators can enable support on a global level to prefix the Graphite metrics with the Cloud Foundry organization and space. This means that all metrics of all Service Instances (not only yours!) contain that information.
In this case the Graphite metric paths have the following format:
<organization_guid>.<space_guid>.<service_guid>.<service_type>.<host>.<metric>
When you enable in addition the metrics_prefix for your instance, you will end up with the metric path format:
<metrics_prefix>.<organization_guid>.<space_guid>.<service_guid>.<service_type>.<host>.<metric>
Metrics
Following a list of the RabbitMQ metric patterns which will be streamed to a colocated Prometheus endpoint. The metrics can be divided into the groups:
- Node Metrics
- Queue Metrics
- Ghost Queues
- Port Checks
- General
Starting with a9s Messaging 4.0, metrics have been changed to include all available RabbitMQ metrics for the three endpoints. Node, Queue and General (Cluster-wide metrics).
For more information about all available metrics for a9s Messaging 4.0 see the RabbitMQ Monitoring documentation and the RabbitMQ HTTP API documentation.
Node Metrics
These metrics provide insight into detailed information about the state of nodes. Most of the metrics represent point-in-time absolute values. The latter metrics are most useful when compared to their previous values and historical mean/percentile values.
Documentation source:
- RabbitMQ Monitoring Node Documentation
- RabbitMQ HTTP API Documentation
- The metrics description on this documentation might change between version.
| Group Id | Type | Description |
|---|---|---|
disk_free | Integer | Disk free space in bytes. |
disk_free_details.rate | Float | Rate of the disk_free metric. |
disk_free_limit | Integer | Point at which the disk alarm will go off. |
fd_total | Integer | File descriptors available. |
fd_used | Integer | Used file descriptors. |
io_read_avg_time | Integer | Average wall time (milliseconds) for each disk read operation in the last statistics interval. |
io_read_avg_time_details.rate | Float | Rate of the io_read_avg_time metric. |
io_read_bytes | Integer | Total number of bytes read from disk by the persister. |
io_read_bytes_details.rate | Float | Rate of the io_read_bytes metric. |
io_read_count | Integer | Total number of read operations by the persister. |
io_read_count_details.rate | Float | Rate of the io_read_count metric. |
io_sync_avg_time | Integer | Average wall time (milliseconds) for each fsync() operation in the last statistics interval. |
io_sync_avg_time_details.rate | Float | Rate of the io_sync_avg_time metric. |
io_write_avg_time | Integer | Average wall time (milliseconds) for each disk write operation in the last statistics interval. |
io_write_avg_time_details.rate | Float | Rate of the io_write_avg_time metric. |
mem_limit | Integer | Point at which the memory alarm will go off. |
mem_used | Integer | Memory used in bytes. |
mem_used_details.rate | Float | Rate of the mem_used metric. |
partitioned | Integer | Displays the partitions visible to this node. The value is 1 when partitions amount is greater than 0, otherwise it is 0. |
proc_total | Integer | Maximum number of Erlang processes. |
proc_used | Integer | Number of Erlang processes in use. |
sockets_total | Integer | File descriptors available for use as sockets. |
sockets_used | Integer | File descriptors used as sockets. |
uptime | Integer | Time since the Erlang VM started, in milliseconds. |
*.rabbitmq.*.*.*.*.node.disk_free
*.rabbitmq.*.*.*.*.node.disk_free_details.rate
*.rabbitmq.*.*.*.*.node.disk_free_limit
*.rabbitmq.*.*.*.*.node.fd_total
*.rabbitmq.*.*.*.*.node.fd_used
*.rabbitmq.*.*.*.*.node.io_read_avg_time
*.rabbitmq.*.*.*.*.node.io_read_avg_time_details.rate
*.rabbitmq.*.*.*.*.node.io_read_bytes
*.rabbitmq.*.*.*.*.node.io_read_bytes_details.rate
*.rabbitmq.*.*.*.*.node.io_read_count
*.rabbitmq.*.*.*.*.node.io_read_count_details.rate
*.rabbitmq.*.*.*.*.node.io_sync_avg_time
*.rabbitmq.*.*.*.*.node.io_sync_avg_time_details.rate
*.rabbitmq.*.*.*.*.node.io_write_avg_time
*.rabbitmq.*.*.*.*.node.io_write_avg_time_details.rate
*.rabbitmq.*.*.*.*.node.mem_limit
*.rabbitmq.*.*.*.*.node.mem_used
*.rabbitmq.*.*.*.*.node.mem_used_details.rate
*.rabbitmq.*.*.*.*.node.partitioned
*.rabbitmq.*.*.*.*.node.proc_total
*.rabbitmq.*.*.*.*.node.proc_used
*.rabbitmq.*.*.*.*.node.sockets_total
*.rabbitmq.*.*.*.*.node.sockets_used
*.rabbitmq.*.*.*.*.node.uptime
Queue Metrics
These metrics provide insight into information about queue metrics. They expose the information of each individual queue available on the system.
Documentation source:
- RabbitMQ List Queues Documentation
- RabbitMQ Monitoring Node Documentation
- RabbitMQ HTTP API Documentation
- The metrics description on this documentation might change between version.
| Group Id | Type | Description |
|---|---|---|
consumers | Integer | Consumers on a queue. |
memory | Integer | Queue's memory. |
messages | Integer | Sum of ready and unacknowledged messages - total queue depth. |
messages_details.rate | Float | Rate of the messages metric. |
messages_ram | Integer | Ready and unacknowledged messages stored in memory. |
messages_ready | Integer | Messages ready to be delivered to consumers. |
messages_ready_details.rate | Float | Rate of the messages_ready metric. |
messages_ready_ram | Integer | Ready messages stored in memory. |
messages_unacknowledged | Integer | Messages delivered to consumers but not yet acknowledged. |
messages_unacknowledged_details | Float | Rate of the messages_unacknowledged metric. |
messages_unacknowledged_ram | Integer | Unacknowledged messages stored in memory. |
message_bytes | Integer | Size in bytes of ready and unacknowledged messages. |
message_bytes_persistent | Integer | Size in bytes of persistent messages. |
message_bytes_ram | Integer | Size of ready and unacknowledged messages stored in memory. |
message_bytes_ready | Integer | Size in bytes of ready messages. |
message_bytes_unacknowledged | Integer | Size in bytes of all unacknowledged messages. |
backing_queue_status.avg_ack_egress_rate | Integer | Average rate of leaving unacknowledged messages. |
backing_queue_status.avg_ack_ingress_rate | Integer | Average rate of arriving unacknowledged messages. |
backing_queue_status.avg_egress_rate | Integer | Average engress rate. |
backing_queue_status.avg_ingress_rate | Integer | Average ingress rate. |
backing_queue_status.len | Integer | Total queue length. |
backing_queue_status.next_seq_id | Integer | Next sequence ID. |
backing_queue_status.q1 | Integer | Amount of queues type Q1. |
backing_queue_status.q2 | Integer | Amount of queues type Q2. |
backing_queue_status.q3 | Integer | Amount of queues type Q3. |
backing_queue_status.q4 | Integer | Amount of queues type Q4. |
*.rabbitmq.*.*.*.*.queue.<queue-name>.consumers
*.rabbitmq.*.*.*.*.queue.<queue-name>.memory
*.rabbitmq.*.*.*.*.queue.<queue-name>.messages
*.rabbitmq.*.*.*.*.queue.<queue-name>.messages_details.rate
*.rabbitmq.*.*.*.*.queue.<queue-name>.messages_persistent
*.rabbitmq.*.*.*.*.queue.<queue-name>.messages_ram
*.rabbitmq.*.*.*.*.queue.<queue-name>.messages_ready
*.rabbitmq.*.*.*.*.queue.<queue-name>.messages_ready_details.rate
*.rabbitmq.*.*.*.*.queue.<queue-name>.messages_ready_ram
*.rabbitmq.*.*.*.*.queue.<queue-name>.messages_unacknowledged
*.rabbitmq.*.*.*.*.queue.<queue-name>.messages_unacknowledged_details.rate
*.rabbitmq.*.*.*.*.queue.<queue-name>.messages_unacknowledged_ram
*.rabbitmq.*.*.*.*.queue.<queue-name>.message_bytes
*.rabbitmq.*.*.*.*.queue.<queue-name>.message_bytes_persistent
*.rabbitmq.*.*.*.*.queue.<queue-name>.message_bytes_ram
*.rabbitmq.*.*.*.*.queue.<queue-name>.message_bytes_ready
*.rabbitmq.*.*.*.*.queue.<queue-name>.message_bytes_unacknowledged
*.rabbitmq.*.*.*.*.queue.<queue-name>.backing_queue_status.avg_ack_egress_rate
*.rabbitmq.*.*.*.*.queue.<queue-name>.backing_queue_status.avg_ack_ingress_rate
*.rabbitmq.*.*.*.*.queue.<queue-name>.backing_queue_status.avg_egress_rate
*.rabbitmq.*.*.*.*.queue.<queue-name>.backing_queue_status.avg_ingress_rate
*.rabbitmq.*.*.*.*.queue.<queue-name>.backing_queue_status.len
*.rabbitmq.*.*.*.*.queue.<queue-name>.backing_queue_status.next_seq_id
*.rabbitmq.*.*.*.*.queue.<queue-name>.backing_queue_status.q1
*.rabbitmq.*.*.*.*.queue.<queue-name>.backing_queue_status.q2
*.rabbitmq.*.*.*.*.queue.<queue-name>.backing_queue_status.q3
*.rabbitmq.*.*.*.*.queue.<queue-name>.backing_queue_status.q4
The backing_queue_status provides information about the state of a queue in RabbitMQ, using various metrics related to
the queue’s internal state. These metrics are only present if announced by the RabbitMQ queue information.
Please be aware that the periods (.) of the queue's name are replaced with underscores (_) in the queue metrics.
This is necessary since a periods is reserved as path separator for Graphite metric names.
backing_queue_status DeprecationAs of RabbitMQ 3.13, the backing_queue_status metric has been deprecated and is removed with a9s Messaging 4.
Therefore, as of a9s Messaging 4.X and above, the backing_queue_status are not available anymore.
Ghost Queues
The idea behind this metric is to support the detection of ghost queues. Ghost queues are a known rabbitmq bug/artefact, so ideally this metric shouldn't appear.
*.rabbitmq.*.*.*.*.<ghost_queue>.<ghost-queue-name>
Please be aware that the periods (.) of the queue's name are replaced with underscores (_) in the queue metrics.
This is necessary since a periods is reserved as path separator for Graphite metric names.
Port Checks
These metrics provide insight into information about a9s RabbitMQ services ports.
| Group Id | Type | Description |
|---|---|---|
amqp_port_open | Integer (0 - Closed / 1 - Open) | Show the amqp open port. |
amqp_tls_port_open | Integer (0 - Closed / 1 - Open) | Show the amqp tls open ports. |
epmd_port_open | Integer (0 - Closed / 1 - Open) | Show the epmd open port. |
http_api_port_open | Integer (0 - Closed / 1 - Open) | Show the http api open port. |
mqtt_client_port_open | Integer (0 - Closed / 1 - Open) | Show the mqtt client open port. |
mqtt_client_tls_port_open | Integer (0 - Closed / 1 - Open) | Show the mqtt client tls open port. |
stomp_port_open | Integer (0 - Closed / 1 - Open) | Show the stomp open port. |
stomp_tls_port_open | Integer (0 - Closed / 1 - Open) | Show the stomp tls open port. |
web_mqtt_port_open | Integer (0 - Closed / 1 - Open) | Show the web mqtt tls open port. |
web_stomp_port_open | Integer (0 - Closed / 1 - Open) | Show the web stomp open port. |
*.rabbitmq.*.*.*.*.port_checks.amqp_port_open
*.rabbitmq.*.*.*.*.port_checks.amqp_tls_port_open
*.rabbitmq.*.*.*.*.port_checks.epmd_port_open
*.rabbitmq.*.*.*.*.port_checks.http_api_port_open
*.rabbitmq.*.*.*.*.port_checks.mqtt_client_port_open
*.rabbitmq.*.*.*.*.port_checks.mqtt_client_tls_port_open
*.rabbitmq.*.*.*.*.port_checks.stomp_port_open
*.rabbitmq.*.*.*.*.port_checks.stomp_tls_port_open
*.rabbitmq.*.*.*.*.port_checks.web_mqtt_port_open
*.rabbitmq.*.*.*.*.port_checks.web_stomp_port_open
General
These metrics provide insight into general information about a9s Messaging.
Documentation source:
- RabbitMQ Monitoring Cluster-Wide-Metrics Documentation
- RabbitMQ HTTP API Documentation
- The metrics description on this documentation might change between versions.
| Group Id | Type | Description |
|---|---|---|
connections | Integer | Total amount of connections. |
collect_time | Integer (ms) | The time it took to collect the server status information. |
metric_fetch_status | Integer (0 - success / 1 - fail) | Status of the last server status collection operation. |
*.rabbitmq.*.*.*.*.connections
*.rabbitmq.*.*.*.*.collect_time
*.rabbitmq.*.*.*.*.metric_fetch_status
System Metrics
Aside from the metrics shown above, this Data Service also provides system metrics, common to all a9s Data Services. They can be seen in the Graphite metrics documentation.
Add a Syslog Endpoint
The cf update-service command used with the -c flag
can let you stream your syslog to a third-party service. In this case, the command expects a JSON string containing the
syslog key. A single endpoint item for syslog can be provided, as well as an array of endpoints.
host and port are mandatory parameters.
The protocol parameter is optional. The accepted values are:
udpsetsrfcby default torfc3164.tcpsetsrfcby default torfc3164.ssl-tcpsetsrfcby default torfc6587.- For
ssl-tcp;ssl_certandssl_keyare required parameters. - If
ssl_verifyis set totrue, thenssl_cacertmust also be provided.
- For
To remove all endpoints, simply set syslog to [].
rfc valuesOptionally, the rfc parameter can be explicitly overwritten.
Valid values: rfc3164, rfc5424 and rfc6587.
cf update-service my-service \
 -c '{
  "syslog": [
    {
      "host": "logs4.your-syslog-endpoint.com",
      "port": "6514",
      "protocol": "ssl-tcp",
      "rfc": "rfc6587",
      "ssl_cert": "-----BEGIN CERTIFICATE----- ... -----END CERTIFICATE-----",
      "ssl_key": "-----BEGIN CERTIFICATE----- ... -----END CERTIFICATE-----",
      "ssl_cacert": "-----BEGIN PRIVATE KEY----- ... -----END PRIVATE KEY-----",
      "ssl_verify": "false"
    }
  ]
}'
The legacy format to specify syslog endpoints (["hostname1:port1", "hostname2:port2"]) is still supported.
For a9s Messaging Service Instances which are still using RabbitMQ < 4.0, only Legacy Syslog format is supported:
["hostname1:port1", "hostname2:port2"]
Cloud Foundry Application Security Groups
This topic describes how to check whether a security group was created.
Each a9s Data Service will automatically create and update Cloud Foundry security groups in order to protected Service Instances to be accessed by applications not running in the same Cloud Foundry applications space.
To get a better understanding about Security Groups you can have a look on the Understanding Application Security Groups topic.
Get Service Instance GUID
Run cf service INSTANCE_NAME --guid to get the guid of the Service Instance.
$ cf service my-rabbitmq --guid
ca16f111-5073-40b7-973a-156c75dd3028
Check available Security Groups
To see all available security groups use cf security-groups.
$ cf security-groups
Getting security groups as demo@anynines.com
OK

     Name                                         Organization     Space
#0   public_networks
#1   dns
#2   tcp_open
#3   guard_432fb752-876d-443b-a311-a075f4df2237   demonstrations   demo
#4   guard_ca16f111-5073-40b7-973a-156c75dd3028   demonstrations   demo
There we can see a security group with the name guard_ca16f111-5073-40b7-973a-156c75dd3028 was successfully created.
In some circumstances the connection between the application and the Service Instance is not possible, in this case check if a security group was created.
Backup and Restore Service Instances
a9s Messaging provides an easy way to create backups and restore if needed. For a more detailed description, please see the a9s Service Dashboard documentation.
When creating a backup for a9s Messaging, please note that only the queue definitions are stored. The actual messages within the queues are not saved, as this service is designed for non-persistent queues.
When restoring a backup, any missing queues will be added to the service. Meanwhile, the existing queues and their corresponding data, that existed before the backup was created, will be preserved.
RabbitMQ Custom Parameters
As an end user you have the opportunity to customize your Service Instance by using custom parameters. Custom parameters
are passed on to a Service Instance by using the -c switch of the cf CLI commands cf create-service and
cf update-service. For example:
cf update-service my-instance -c '{"my_custom_parameter": "value"}'
would set the custom parameter named my_custom_parameter to the value value for the Service Instance my-instance.
You don't have to utilize those settings. There are sane defaults in place that fit your service plan well.
Every parameter corresponds to a property in the configuration file for the respective RabbitMQ version.
consumer_timeout
RabbitMQ's consumer_timeout parameter, see Delivery Acknowledgement Timeout,
can be specified via the custom parameter consumer_timeout.
An integer value greater than or equal to 1800000 is expected.
The default value is 1800000.
The unit is milliseconds.
tls-protocols
You can specify the TLS protocol version via the custom parameter tls-protocols. The custom parameter tls-protocols
correlates with RabbitMQ's configuration parameter ssl_options.versions, see
Limiting TLS Versions Used by the Server.
An array with protocol versions is expected. The allowed protocol version values are tlsv1.3 and tlsv1.2.
tls-ciphers
You can limit the TLS ciphers via the custom parameter tls-ciphers. The custom parameter tls-ciphers correlates with
RabbitMQ's configuration parameter ssl_options.ciphers, see Configuring Cipher Suites.
An array with cipher names is expected.
There is no validation enabled for the user provided value and therefore existing instances can break when applying this parameter.
Use RabbitMQ Plugins
a9s Messaging allows to enable the following RabbitMQ plugins:
- rabbitmq_consistent_hash_exchange
- rabbitmq_federation
- rabbitmq_federation_management
- rabbitmq_mqtt
- rabbitmq_sharding
- rabbitmq_shovel
- rabbitmq_shovel_management
- rabbitmq_stomp
- rabbitmq_tracing
- rabbitmq_webstomp (available with a9s Messaging 4.0 and above)
- rabbitmq_webmqtt (available with a9s Messaging 4.0 and above)
Plugin Activation
You can activate RabbitMQ plugins with the cf create-service and
cf update-service commands using additional configuration parameters.
cf create-service a9s-messaging313 rabbitmq-single-small my-messaging-service \
  -c '{ "plugins": ["rabbitmq_shovel", "rabbitmq_shovel_management"] }'
cf update-service my-messaging-service \
  -c '{ "plugins": ["rabbitmq_shovel", "rabbitmq_shovel_management"] }'
Plugins for Protocols
Some plugins that can be enabled with a9s Messaging provide additional protocols for use with RabbitMQ. The usernames
and passwords for these protocols are the same as with the default ACMQ protocol. Protocols enabled via plugin will be
set to the default \ RabbitMQ vhost.
| Protocal | TCP Port | SSL Port | Further information |
|---|---|---|---|
| MQTT | 1883 | 8883 | RabbitMQ MQTT Docs |
| WebMQTT | 15675 | 15676 | RabbitMQ MQTT Docs |
| STOMP | 61613 | 61614 | RabbitMQ STOMP Docs |
| WebSTOMP | 15674 | 15673 | RabbitMQ STOMP Docs |
Create Messaging Users
a9s Messaging allows to create new users with different roles (permissions) by creating service keys.
The possible roles are:
- management
- policymaker
- monitoring
- administrator
You can read more about RabbitMQ roles and permissions here.
Create a New Role
You can create a new user with specific permissions (roles) giving the role following custom parameter. This parameter
receives an array of roles:
cf create-service-key my-messaging-service my-key -c '{"roles": ["administrator", "management"]}'
Use RabbitMQ Management Dashboard
a9s Messaging has management dashboard support enabled. The dashboard is running on the Service Instance VM so it is not possible to open the dashboard in your browser directly.
Option: via (Go) router
When the Platform Operator has configured the (Go)router to route the RabbitMQ Management Dashboard the dashboard will
be exposed under a URL formatted as https://service-instance-guid.a9s-rabbitmq-dashboard.system.domain.
Obtaining the Dashboard URL
The dashboard URL that provides access to the a9s dashboard contains all the information required, to create a URL that will access the RabbitMQ Dashboard. This command will create the URL you need:
cf service a9s-messaging-serive-instance | grep dashboard | sed 's/^.*https:\/\/\(.*\)\/service-instances\/\(.*\)/https:\/\/\2.\1/'
You can use this URL to navigate to the dashboard login page in your web browser.
Obtaining Credentials
To log into the RabbitMQ dashboard you will need a username and a password. If you want to see the dashboard from the perspective of your app, you could use the apps credentials. Accessing the credential used by your app is simple:
cf env your-app-name
If you would prefer to have a separate RabbitMQ user for accessing the dashboard you can create and use a service key:
cf create-service-key a9s-messaging-service-instance dashboard
cf service-key a9s-messaging-service-instance dashboard
Option: with CF SSH
CF provides a smart way to create SSH forward tunnels via a pushed application.
Make sure that SSH access to the app is enabled. You can enable SSH access with cf enable-ssh MY-AWESOME-APP. If you
do not have permission, contact your administrator.
For more information about this feature see the Accessing Apps with SSH section of the CF documentation.
First of all you must have an application bound to the service. How to do this see Bind an Application to a Service Instance.
cf ssh support must be enabled in the platform. Ask your administrator if you are not sure.
Get Dashboard Url and Credentials
When you follow this instructions Obtain Service Instance Access Credentials you will get the hostname of the service and the user credentials.
$ cf env rabbitmq-app
Getting env variables for app rabbitmq-app in org phartz / space develop as admin...
OK

System-Provided:
{
 "VCAP_SERVICES": {
  "a9s-messaging313": [
   {
    "credentials": {
     "host": "d67901c.service.dc1.a9svs",
     "username": "a9s-brk-usr",
     "password": "a9s-password",
     "port": 5672,
     "uri": "amqp://a9s-brk-usr:a9s-password@d67901c.service.dc1.a9svs:5672"
    },
    "label": "a9s-messaging313",
    "name": "mymessaging",
    "plan": "messaging-single-small",
    "provider": null,
    "syslog_drain_url": null,
    "tags": [
     "message broker"
    ],
    "volume_mounts": []
  }
  ]
 }
}
Notice the host d67901c.service.dc1.a9svs, the username a9s-brk-usr and the password a9s-password. You will need
this in the next step.
Create Tunnel to The Management Dashboard
With the cf ssh as mentioned before you can create a ssh forward tunnel to the management dashboard.
$ cf ssh rabbitmq-app -L 15672:d67901c.service.dc1.a9svs:15672
vcap@956aaf4e-6da9-4f69-4b1d-8e631a403312:~$
Don't forget to close the session with exit.
Login to The Management Dashboard
When the ssh tunnel is open, you can access the Dashboard with your Browser. Depending on the service plan used for your Service Instance, you have to visit one of the following URLs:
- http://localhost:15672 for NON-SSL Service Instances (any version)
- https://localhost:15672 for SSL Service Instances (any version)
To login to the management dashboard you need the user credentials.

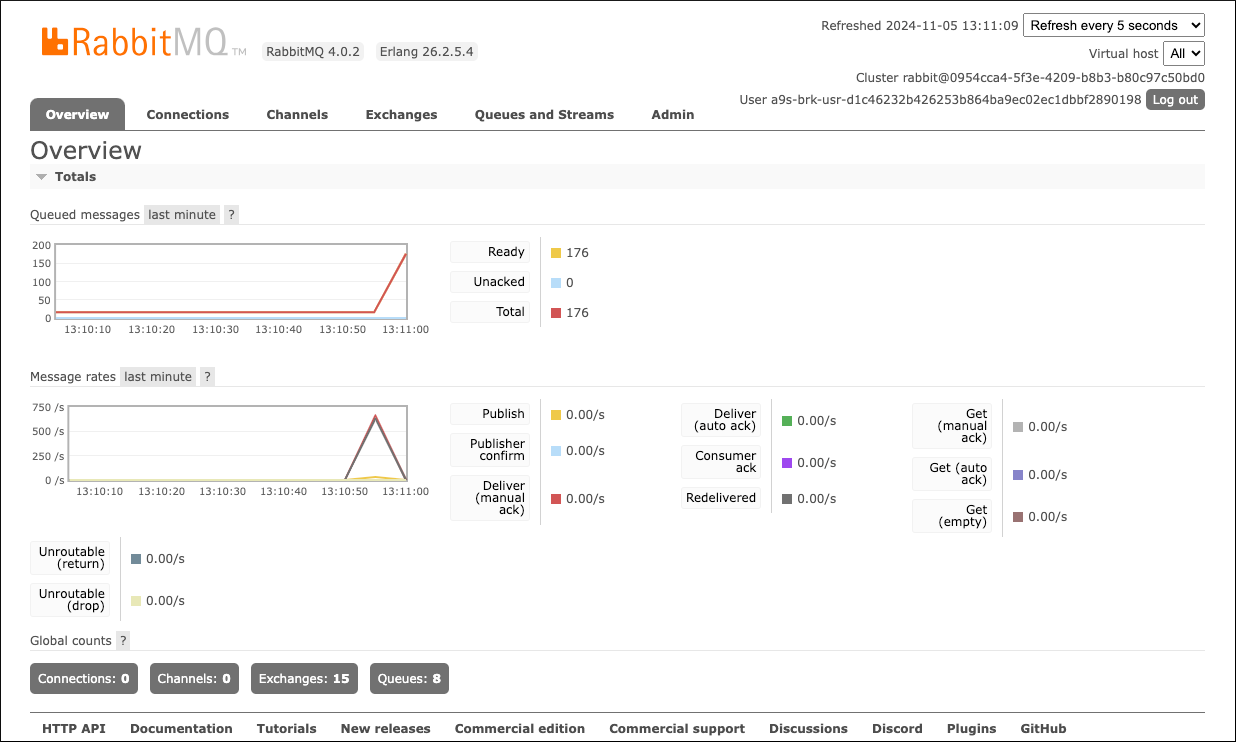
If the login was successful, you should see the dashboard as followed.
Using High Availability Queues in Cluster Setup
If clusters are enrolled, this does not mean that all created queues are HA queues!
High Availability in a9s Messaging 4.X and above
For a9s Messaging 4.X and above, HA is available by default for all quorum queues. The mirrored classic queues from the previous RabbitMQ versions were removed and the still existing classic queues are not able to be replicated anymore.
High Availability in a9s Messaging 3.13 and below
For a9s Messaging 3.13 and below, there are two policies defined to allow HA queues and no HA queues. These policies are depending on the queue name.
If the queue name starts with ha. the queue is a HA queue and consists of clusternodecount/2 + 1 queues (one
master queue and the rest mirror queues).
This guarantees that in the case of a network partition, the queue is still available in the bigger partition. Additionally, it allows to use most of performance of the clusternodes, by reducing replication and queues.
Additionally there is another policy for not important queues, this policy is for
all queues starting with noha., in this case the queue is not mirrored and if the node which hold this queue goes
down, the queue is also not available anymore.
Using custom policies in RabbitMQ
Important: The a9s Messaging 3.13 and below services configure by default two policies named ha and noha.
These policies will always be reconfigured on a restart of a RabbitMQ Service Instance.
Therefore they shouldn't be changed manually.
To create and use custom policies, please see Parameters and Policies — RabbitMQ
Make a Service Instance Locally Available
It is possible to access any of the a9s Data Services locally. That means you can connect with a local client to the service for any purpose such as debbuging. CF provides a smart way to create SSH forward tunnels via a pushed application.
For more information about this feature see the Accessing Apps with SSH section of the CF documentation.
First of all you must have an application bound to the service. How to do this see Bind an Application to a Service Instance.
cf ssh support must be enabled in the platform. Ask your administrator if you are not sure.
Get The Service Url and Credentials
To get the hostname and user credentials of a Service Instance you can follow the steps provided in Obtain Service Instance Access Credentials.
$ cf env a9s-rabbitmq-app
Getting env variables for app a9s-rabbitmq-app in org test / space test as admin...
OK

System-Provided:
{
  "VCAP_SERVICES": {
   "a9s-messaging": [
    {
      "credentials": {
       "host": [
        "d67901c.service.dc1.a9svs"
       ],
       "username": "a9s-brk-usr",
       "password": "a9s-password"
     },
     "label": "a9s-messaging",
     "name": "my-messaging-service",
     "plan": "messaging-cluster-small"
    }
   ]
  }
}
...
Notice the host d67901c.service.dc1.a9svs, the username a9s-brk-usr and the password a9s-password. You will need
them in the next step.
Create a Tunnel to The Service
With the cf ssh as mentioned before you can create a ssh forward tunnel to the management dashboard. Use port 9200 to
connect to the a9s Messaging Instance.
$ cf ssh a9s-rabbitmq-app -L 9200:d67901c.service.dc1.a9svs:9200
vcap@956aaf4e-6da9-4f69-4b1d-8e631a403312:~$
When the ssh tunnel is open you can access the instance over the address localhost:9200.
Don't forget to close the session with exit.
Create a Fork of a Service Instance
The procedure of forking a Service Instance involves creating a backup of a Service Instance and restoring it to a different Service Instance.
Having two Service Instances is a prerequisite for the process:
$ cf s
Getting services in org system / space test as admin...

name         service           plan                      bound apps   last operation
messaging1   a9s-messaging313   messaging-cluster-small   bindingo     create succeeded
messaging2   a9s-messaging313   messaging-cluster-small                create succeeded
Fork an a9s Messaging Service Instance Using the Disaster Recovery Feature
Follow the steps described in Disaster Recovery to create a fork of an existing a9s Messaging Service Instance.
Fork an a9s Messaging Service Instance Manually
This approach has additional prerequisites regarding command line tools:
- BASH (some shell)
- cat
- openssl
- python (see below for the verion required)
- node (tested with v6.11.0)
Open the service dashboard of the Service Instance you want to fork. We use messaging1 for this example. You can find
the dashboard URL like this:
$ cf service messaging1
Showing info of service messaging1 in org system / space test as admin...

name:            messaging1
service:         a9s-messaging313
bound apps:      bindingo
tags:
plan:            messaging-cluster-small
description:     This is a service creating and managing dedicated Messaging Service Instances, powered by the anynines Service Framework
documentation:
dashboard:       https://a9s-messaging-dashboard.de.a9s.eu/service-instances/950cb675-3ed9-4613-8bb6-b2d618391d2f

[...]
Make sure you set a encryption password for the backups using the Service Instance dashboard.
Create a backup using the dashboard. Download the backup to your
local machine. The filename will be something like racsd92baee-1522222422893. Decrypt the backup and write its
contents to a file:
cat racsd92baee-1522222422893 | openssl enc -aes256 -md md5 -d -pass 'pass:mytopsecretpassword' | gunzip -c > backup_settings.json
Create a tunnel to the admin interface (like explained in a previous chapter) of the RabbitMQ instance that will be the fork of the original instance. I used messaging1 as the original instance and messaging2 as the fork instance. The tunnel is needed to get the matching version of the rabbitmqadmin script as well as to restore the backed up data. I assume you're using something like this to set up the tunnel:
cf ssh someapp -L 127.0.0.1:15672:racsd92baee.service.dc1.a9ssvc:15672
racsd92baee.service.dc1.a9ssvc is the host of the messaging2 Service Instance.
Go to http://127.0.0.1:15672/cli/ to download the rabbitmqadmin tool. rabbitmqadmin
is a python script. On that page you'll find information about the python version required.
Download a copy of the backup script restore_queues.js. Make sure to chmod u+x the script.
Restore the backed up queues using the restore script, e.g.:
./restore_queues.js $(which python) ~/Downloads/rabbitmqadmin 127.0.0.1 15672 a9s-brk-usr-xxxxxxxx xxxxxxxyyyyyyyyyzzzzzzzzz ./backup_settings.json
If you are restoring an SSL instance, you will need to do a small change to the restore script:
 args.push("-p")
 args.push(process.argv[7])

+args.push("-s")
+
 args.push("declare")
After this change to the script, you can restore your SSL instance exactly as a non-SSL one:
./restore_queues.js $(which python) ~/Downloads/rabbitmqadmin 127.0.0.1 15672 a9s-brk-usr-xxxxxxxx xxxxxxxyyyyyyyyyzzzzzzzzz ./backup_settings.json
Setup Disk Usage Alerts
Each service comes with the a9s Parachute. This component monitors ephemeral and persistent disk usage. See the a9s Parachute documentation how to configure the component.