Using a9s Service Dashboard
This section describes the usage of the a9s Service Dashboard from the perspective of the Application Developer.
Login
- To get the a9s Service Dashboard URL, use the command
cf service SERVICE-NAME. For example:
$ cf service my-redis
Showing info of service my-redis in org demo / space demo as admin...

name:            my-redis
service:         a9s-redis7
tags:
plan:            redis-single-small
description:     This is a service creating and managing dedicated Redis service instances, powered by the anynines Service Framework
documentation:
dashboard:       https://a9s-redis-dashboard.system.172.28.32.25.xip.io/service-instances/96aaef1d-be67-45fc-a121-25160bf83ab2

This service is not currently shared.

Showing status of last operation from service my-redis...

status:    create succeeded
message:
started:   2023-10-17T11:25:04Z
updated:   2023-10-17T11:29:10Z

There are no bound apps for this service.
- Browse to the dashboard URL and authenticate on the redirected page with your Cloud Foundry credentials:

- Click Authorize to approve the authorization request:

Perform a Backup
Open the a9s Service Dashboard for the a9s Service Instance you want to backup, as shown above. Navigate to the Backups page. There you find a panel with Available Backups and a Settings Icon which opens a submenu where you can find a Manually Trigger A Backup button. Click this button to perform a new backup of the Service Instance.

After a short period of time the backup will be queued. The backup process will start soon.

Depending on the size of the data the backup will take some time.

The backup time displayed is calculated from the moment the backup is queued until its resolution. Meaning the time spent in the queue is currently also part of this amount.
Restore a Backup
Open the a9s Service Dashboard for the Service Instance, as shown above, you want to restore a backup that you performed before. Navigate to the Backups page. There you find a panel with Available Backups and a Restore button next to each backup. Click this button to trigger a restore.

A dialog opens and ask for confirmation. Press the YES button to continue or the No button to abort the restore.

After a short period of time the restore will be queued. The restore process will start soon.

Depending on the size of the data the restore will take some time.
While restoring a backup is usually a straightforward task, it should be noted that after restoring a backup to an a9s Data Service instance, you are required to both rebind your application to your a9s Data Service instance, and to immediately restage it.
Taking Cloud Foundry as an example, this means that after restoring the backup, you should execute the following
commands:
$ cf unbind-service <my_app> <my_service_instance>
$ cf bind-service <my_app> my_service_instance
$ cf restage <my_app>

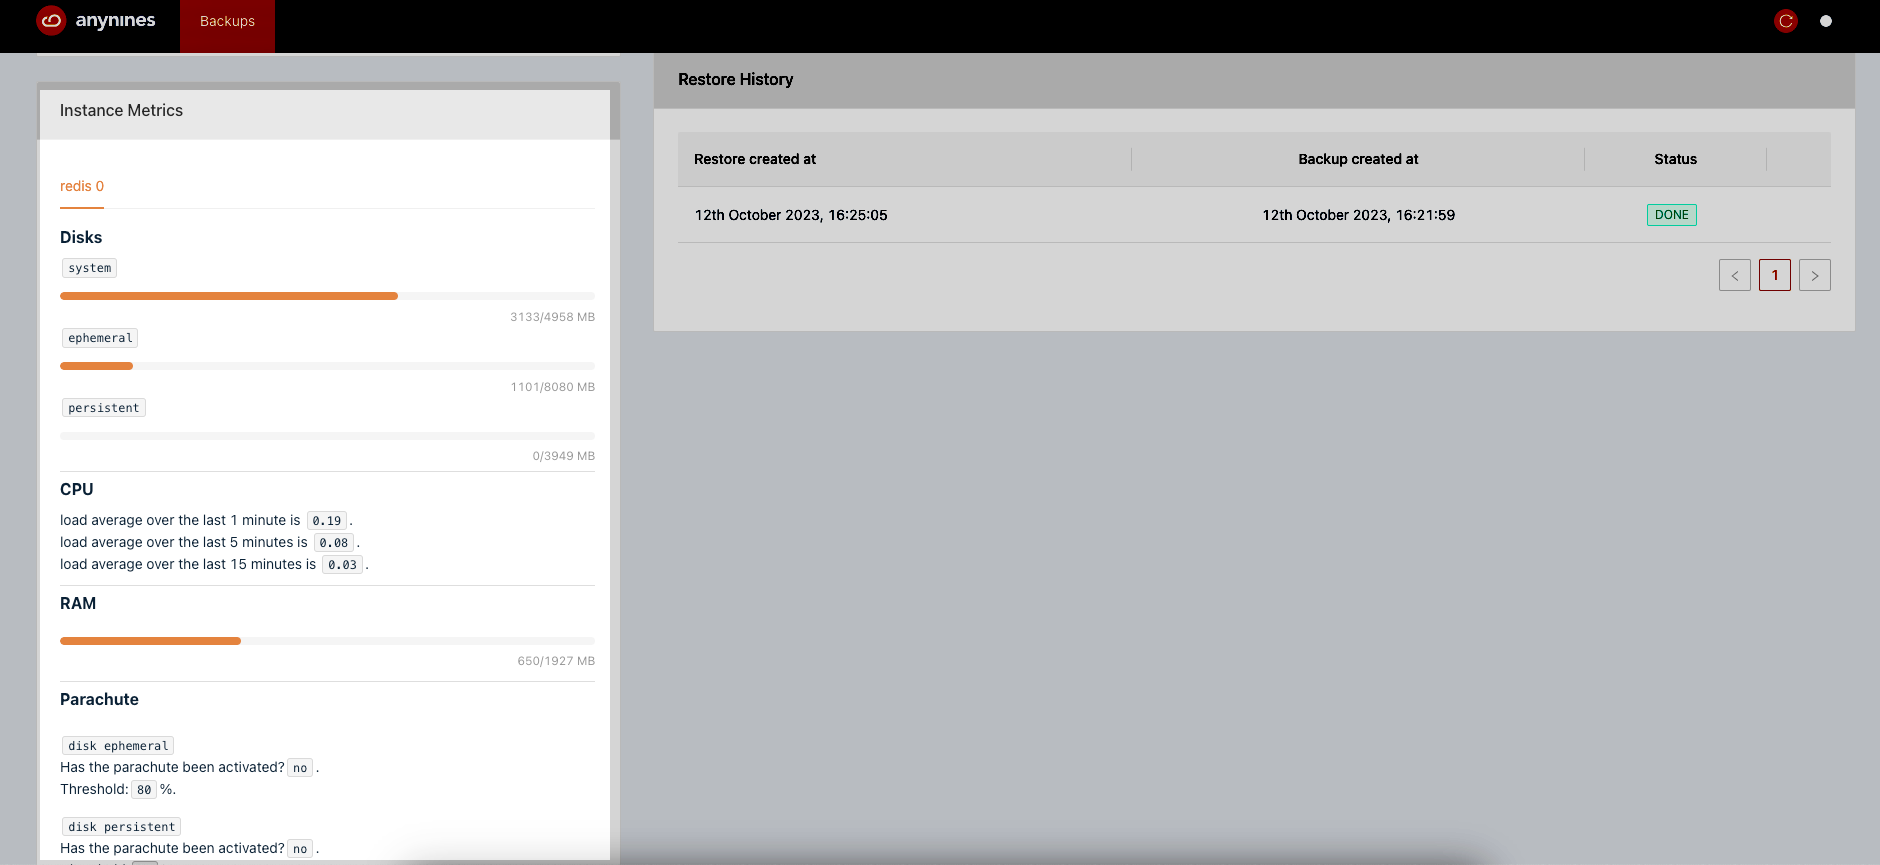
Restore History
When a restore is triggered, it is logged and listed as shown below:

When using a single instance, it is listed as a single entry per restore, as seen before.
In the case of a cluster however, the way that the restores are listed will vary depending on the service in use. This variation can be divided into two groups: master only restore and multi-node restore.
Take for example our a9s Redis service, it does a restore on every node, so these are sequentially generated restores that will appear as multiple restores, but with a fused Backup created at row, as shown below:

On the other hand, a a9s-PostgreSQL service will only execute the restore on the master node. Therefore only one row would be listed, like with the single instance example.
See the following list for further details:
| Data Service | Restore-Type |
|---|---|
| a9s-Elasticsearch | master-only |
| a9s-MariaDB | master-only |
| a9s-PostgreSQL | master-only |
| a9s-Messaging | master-only |
| a9s-Redis | multi-node |
| a9s-MongoDB | multi-node |
Download a Backup
To be able to download a performed backup you have to set a personal encryption key first. Otherwise a performed backup is not downloadable.
To set a personal encryption key, open the a9s Service Dashboard for the appropriate Service Instance as shown above. Navigate to the Backups page and open the Settings menu by clicking the Settings icon on that panel. Afterwards click on the Set Encryption Key button.

Enter your personal encryption key in the field Encryption Key and click the Save button. The default minimum
length for your personal encryption key is 8 characters.

After that, perform a backup as shown above. If the backup is successfully finished the button Download beside the backup becomes clickable. Click this button to download the corresponding backup.

- If you change your personal encryption key again, you are not longer able to download performed backups, encrypted with your old personal encryption key.
- There is a request timeout in the Cloud Foundry
Goroutercomponent to handle external requests. By default, the timeout is configured for 15 minutes, therefore when a request reaches this timeout the request is aborted. To know more or request a change of the timeout, contact your Platform Operator.
Automatic Reload
To reload the information shown, click on the Reload icon in the upper right corner of the dashboard. To enable the
Automatic Reload of the a9s Service Dashboard information, just use the Switch button next to the Reload icon.

Update the Service Instance
To update a service instance, open the Updates page using the navbar on the top of the a9s Service Dashboard. Afterwards you will see if there are any updates available for the selected instance.

Restart or Recreate the Service Instance
To Restart or Recrate a running service instance you are able to use the related buttons in the lower left corner of the a9s Service Dashboard.

The restart button will trigger a shutdown/turn-on actions on all processes of the current instance. The recreate button will remove and recreate the current instance and its related processes.
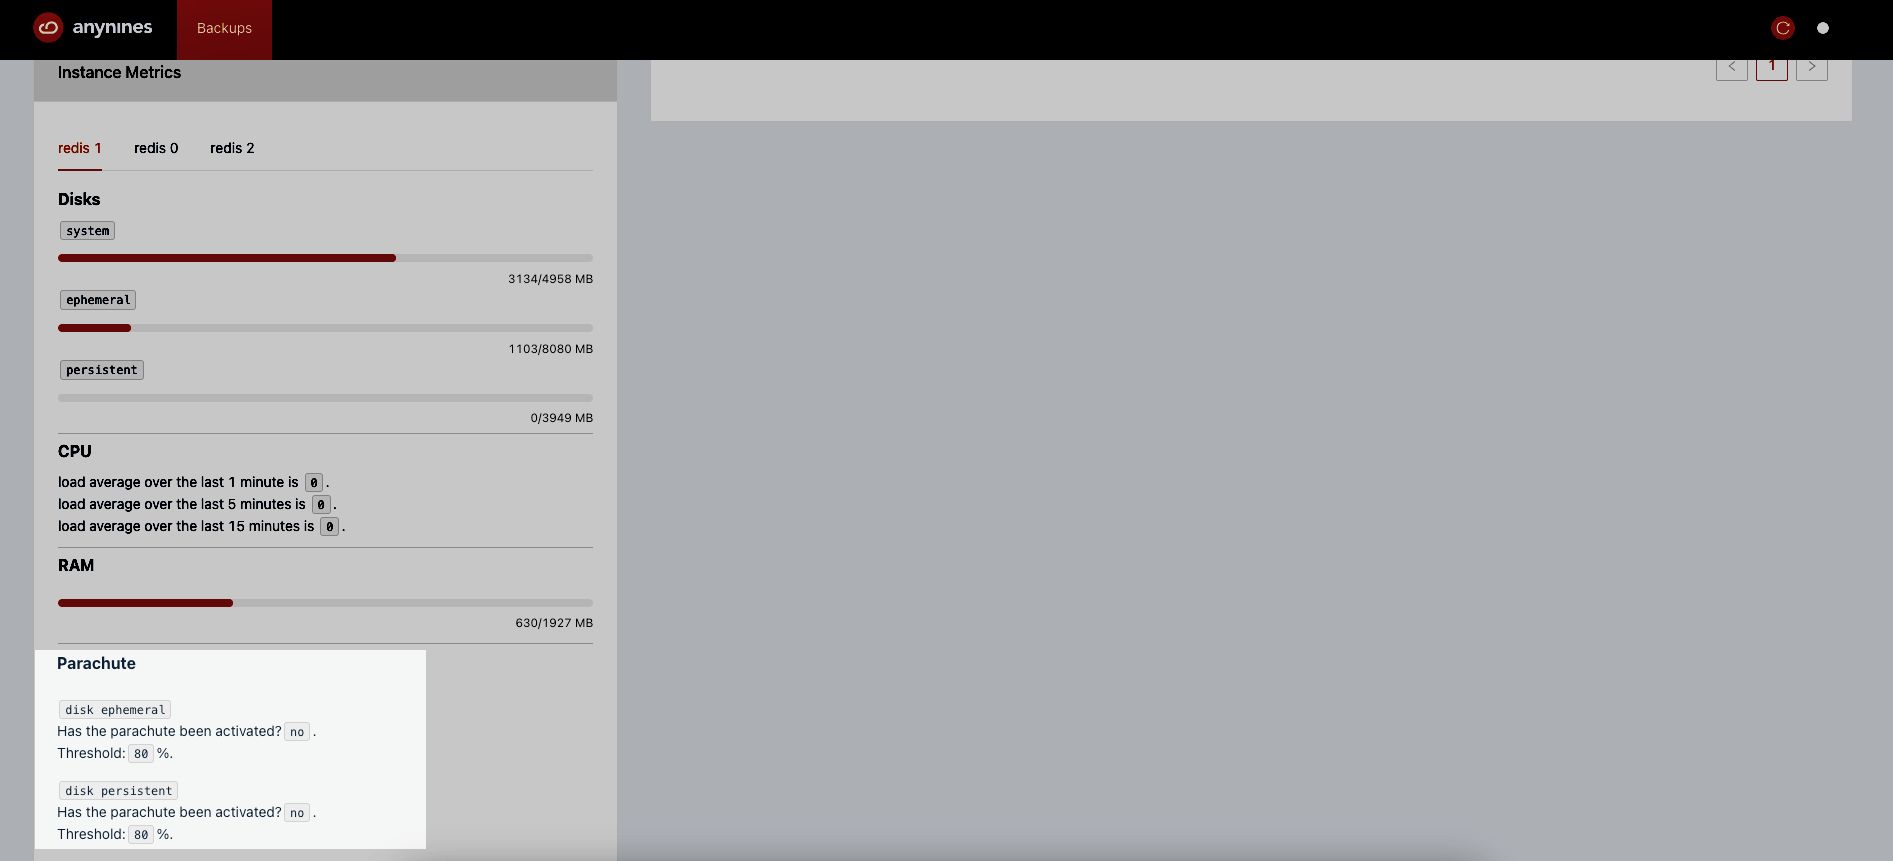
Instance Metrics
The a9s Service Dashboard also offers a visualization of the following metrics from your Service Instance, per node:
This allows you to know at a glance your current consumption of resources.
For a single instance, the metrics are displayed as shown in the image below:
For a cluster instance, the metrics are displayed in separate tabs, one per node, as shown in the image below:
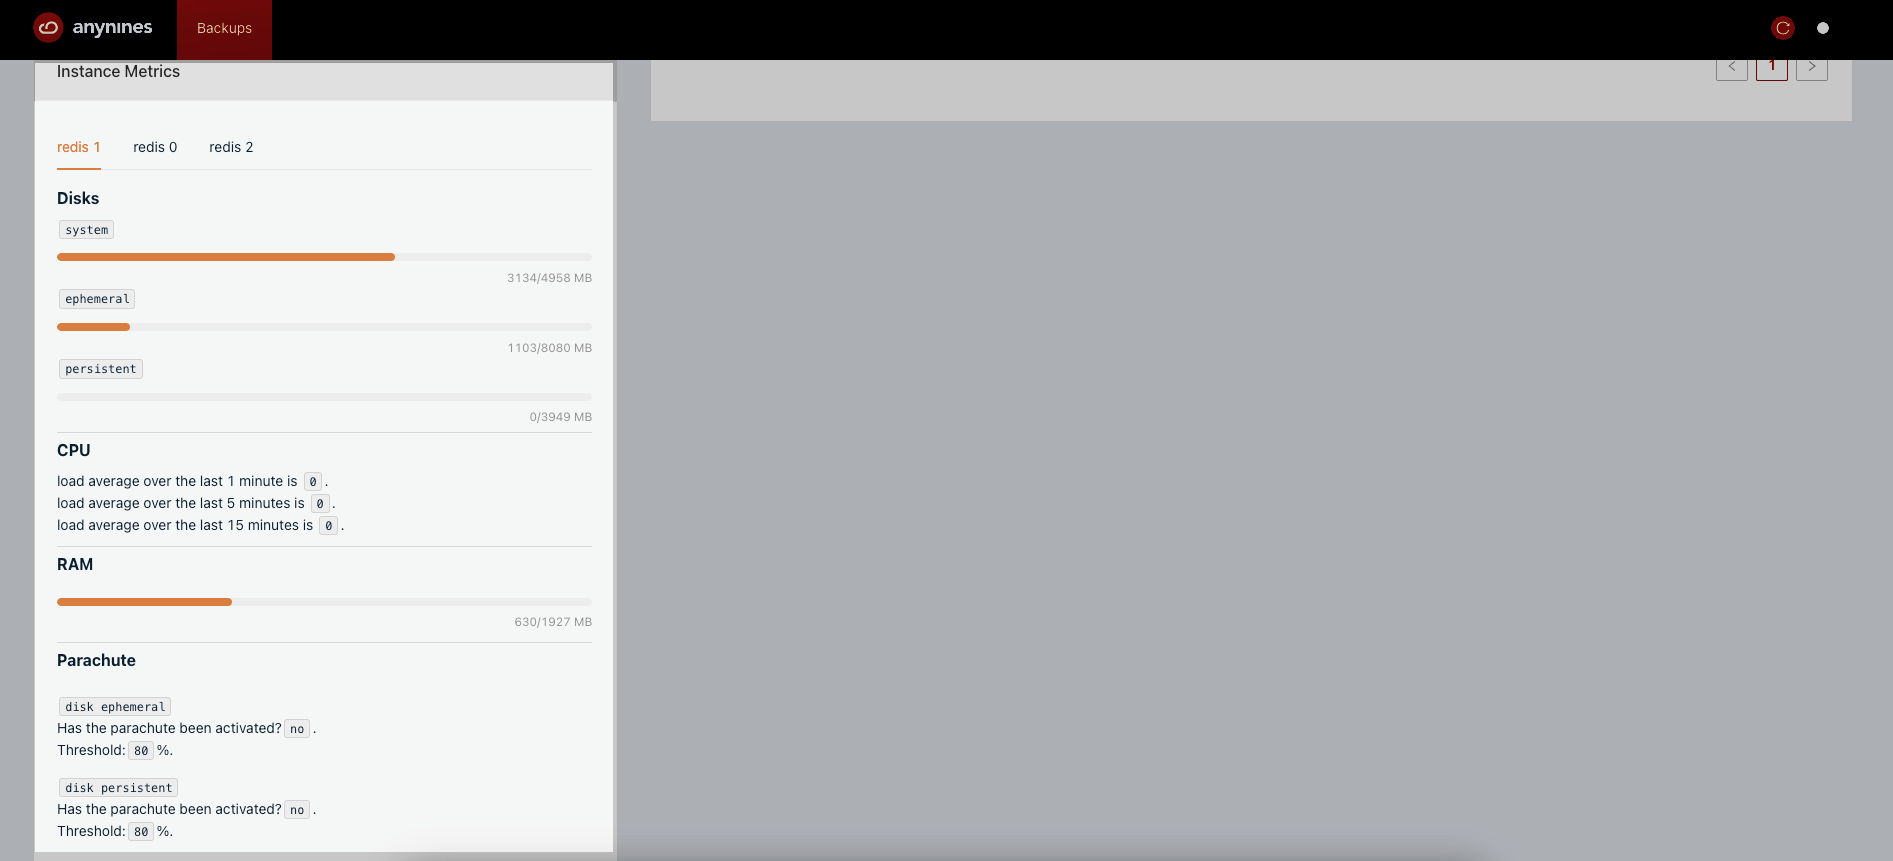
The order of the tabs is dynamic, meaning there is no special order in which they are displayed.
Size Calculation
The metrics collector gathers and shares the Service Instance's metrics in bytes, but these values are too large to be
displayed in a humanly readable way. Therefore, the values are converted to megabytes, and we took the decision to
divide this by 1024^2. Thus, the value displayed by the a9s Service Dashboard might sometimes differ from other tools
that take the approach of dividing by 1000^2.
The data is then displayed in a used/available format.
Disks
The a9s Service Dashboard only displays the following disks:
- system: contains the operating system itself
- ephemeral: mainly used for automation/infrastructure data and log data
- persistent: mainly used for persistent data of the underlying data service
While the metrics of other disks are gathered and shared by the metrics collector they are ignored by the a9s Service Dashboard. This design decision was taken in order to avoid overflowing the a9s Service Dashboard's metrics visualization with temporary disks.
a9s Parachute
The a9s Service Dashboard displays the status of the a9s Parachute, a monitoring component that comes includes with each node of an a9s Service Instance. This component monitors both the ephemeral and persistent disk usage. If the usage of one of these disk reaches the configured threshold, the a9s Parachute stops all processes on that given node.
The information of the a9s Parachute is displayed in the lower left corner of the a9s Service Dashboard. The displayed values are:
- Disk type: either
disk ephemeralordisk persistent. - The current status of a9s Parachute: Expressed as a yes/no answer to the question
Has the parachute been activated?. - The configured threshold:
80%by default.